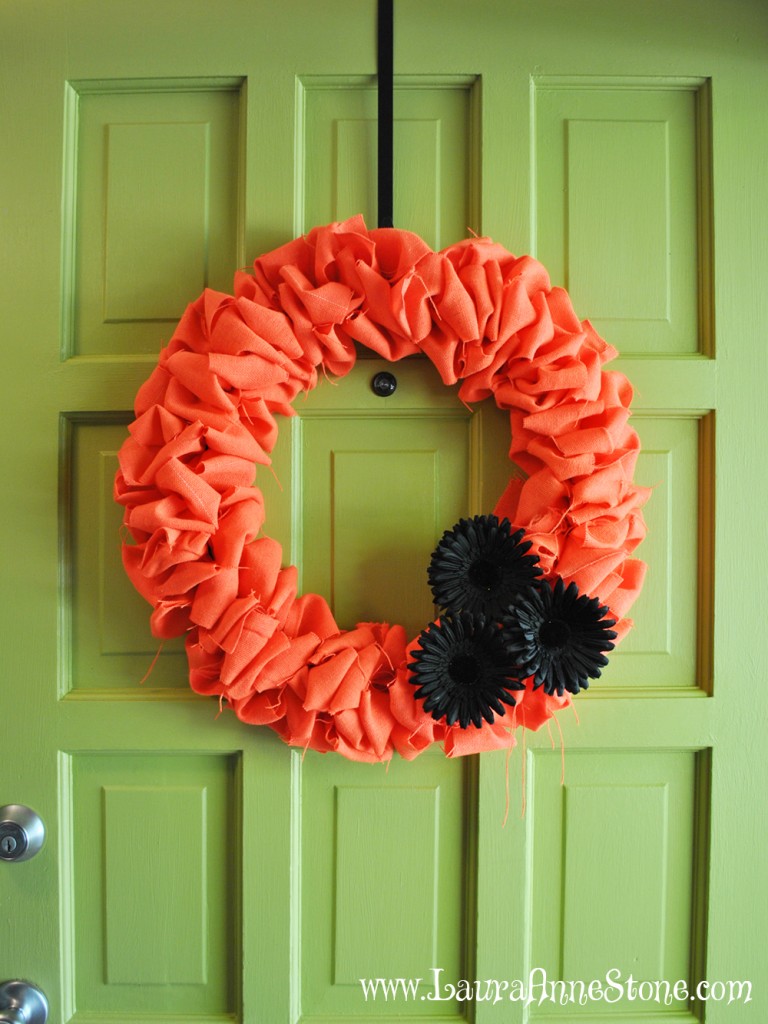
WEEKEND PROJECT: Orange Burlap Halloween Ruffle Wreath
Last fall I kept telling myself I’d get around to making seasonal decorations but it just never seemed to happen, so today I decided to use my do-nothing Sunday to craft something seasonal. I can’t take the credit for inventing this, I saw it somewhere a while ago, but I will take credit for making better directions. I’ve only ever seen limited photos and vague directions that left one to wonder “But how!?” 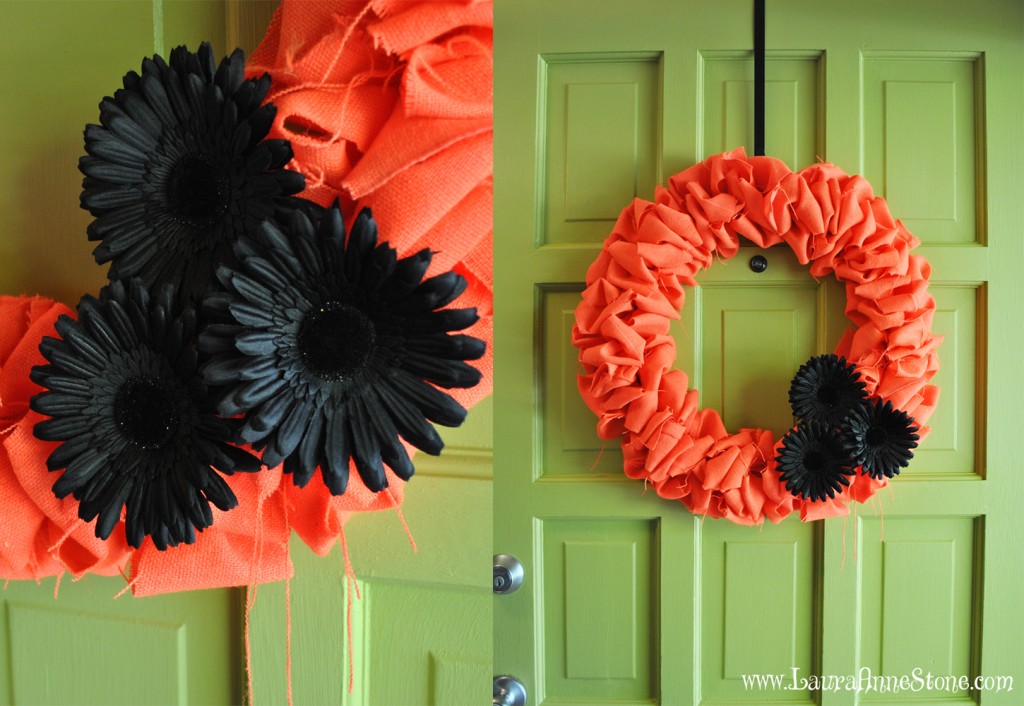 Also, because without it this wouldn’t have happened, I inherited about three yards of this bright orange burlap and I’m so excited I finally have a use for it.
You will need:
- Wire wreath frame
- Fabric (I used about a yard of orange burlap, but you could use pre-cut burlap ribbon or some other heavyweight fabric; other tutorials said something about using a whole 10-yard roll of ribbon but I would get two rolls just in case)
- Scissors or a rotary cutter (a friend is borrowing my cutter but I definitely recommend it… unless, of course, you’re looking for a good hand and forearm workout)
Directions:
- Cut your fabric into 3″- to 4″-wide strips. I did about 3″ strips but if you want a really billowy wreath you might want to cut them a little wider. I wouldn’t go much wider than 4″ or they might get too wide to pull through the wreath frame without flopping over (unless you’re using a really heavy fabric).
- Starting a new strand was the hardest part so the only patience you’ll need for this project, you’ll need right here. Loop your fabric strip through the frame. As I recall, this is where the other tutorials left out necessary photos or further explanation. The photo below shows what I mean by “loop through” but you’ll need to actually twist them 90-degrees so they look like the second photo. From there you just loop them through each row, top-middle-bottom-middle-top-middle-bottom and so on, pushing them back on each other to the desired density of your wreath. Tightly scrunched will have a more densely-packed wreath and will work well with a flexible fabric and not-so-tightly scrunched will give a softer, fluffier wreath and would work well with a stiffer fabric… I think this was a medium-scrunched project because I used medium-weight burlap.
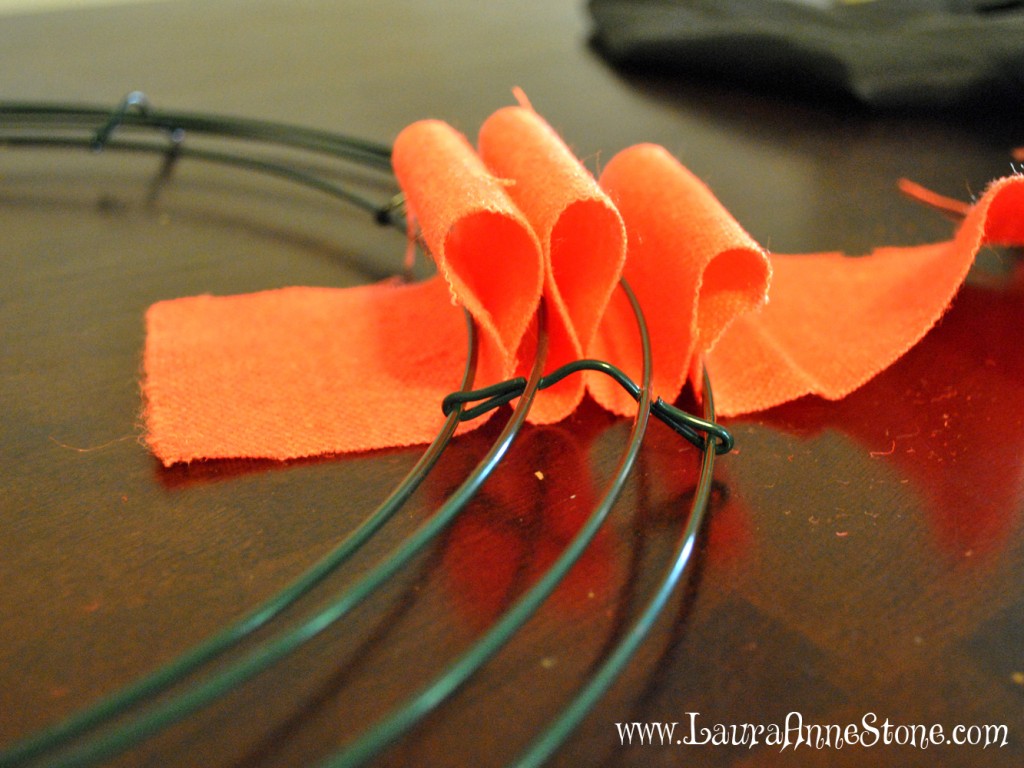
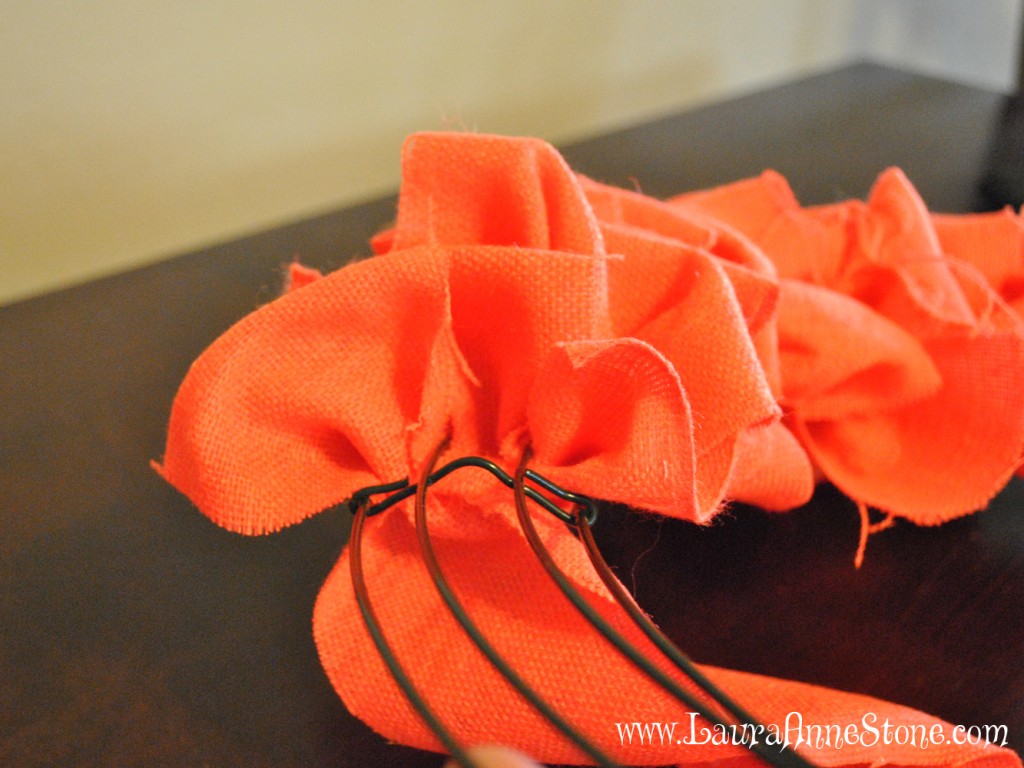
- Continue doing this until the whole wreath frame is full. A word of caution, keep an eye on your loops and their consistency. I was watching Lawrence of Arabia (stop laughing… it was the only thing on that wasn’t sports) and I when I was nearly finished I noticed my sections were fatter, skinnier and inconsistently dense. Apparently I wasn’t paying much attention while I was looping. Of course that doesn’t mean you should use an exact measurement, but just try to keep a consistent “fullness” and density so you don’t have to go and adjust them so much like I did.
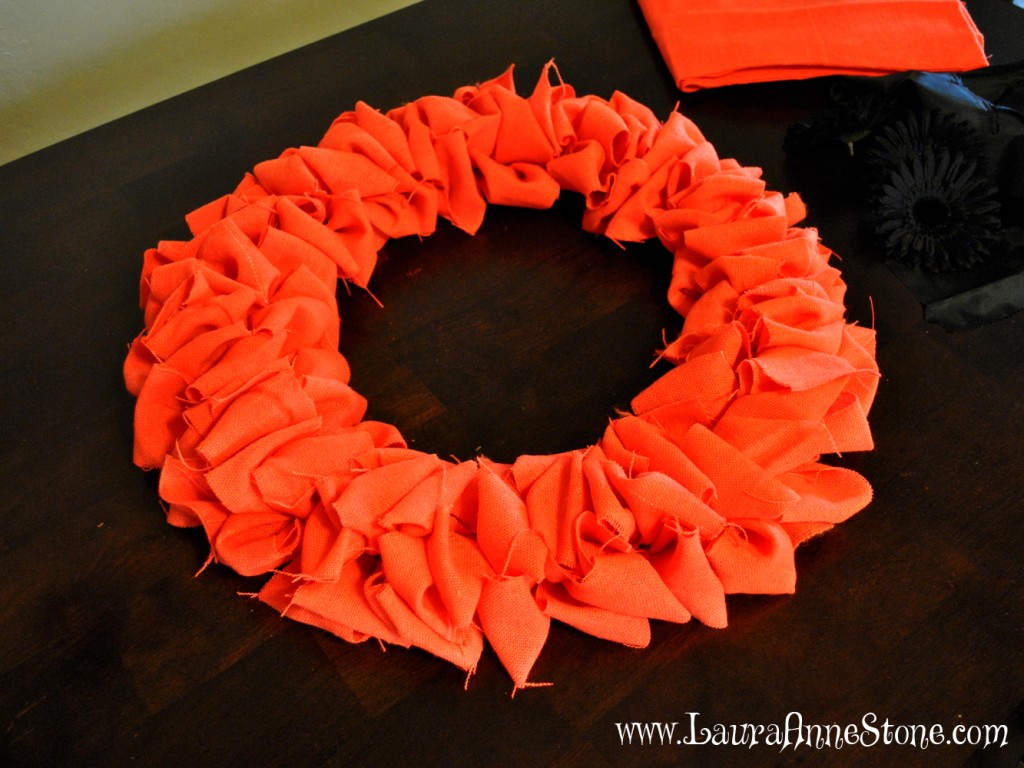
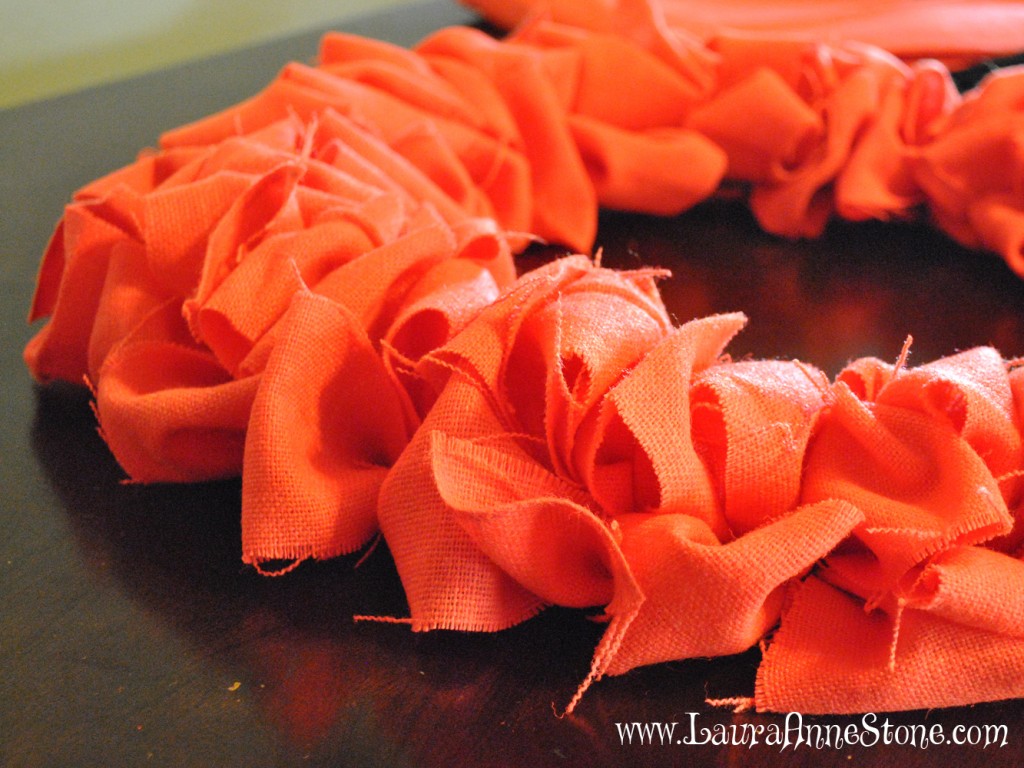
- Once you’re done you’ll need to do a little adjusting- even if you were paying attention- just to ensure you don’t have a bunch of loops laying down on the job. I decided to take a risk and not fasten the fabric to the frame. This is something I’ll likely regret but I wanted to test just how sturdy it is… and since this is a do-nothing Sunday so I’m being a little lazy. If you want to be sure all your hard work won’t unravel, I would suggest using heavy thread or hot glue to secure the fabric from the back.
- Now you can add any embellishments. I used black daisies loosely attached with floral wire (sort of like bobby pins)to avoid compressing any of the ruffles. If you glue anything to the front, don’t use anything too heavy without first securing the fabric to the frame so it won’t pull.
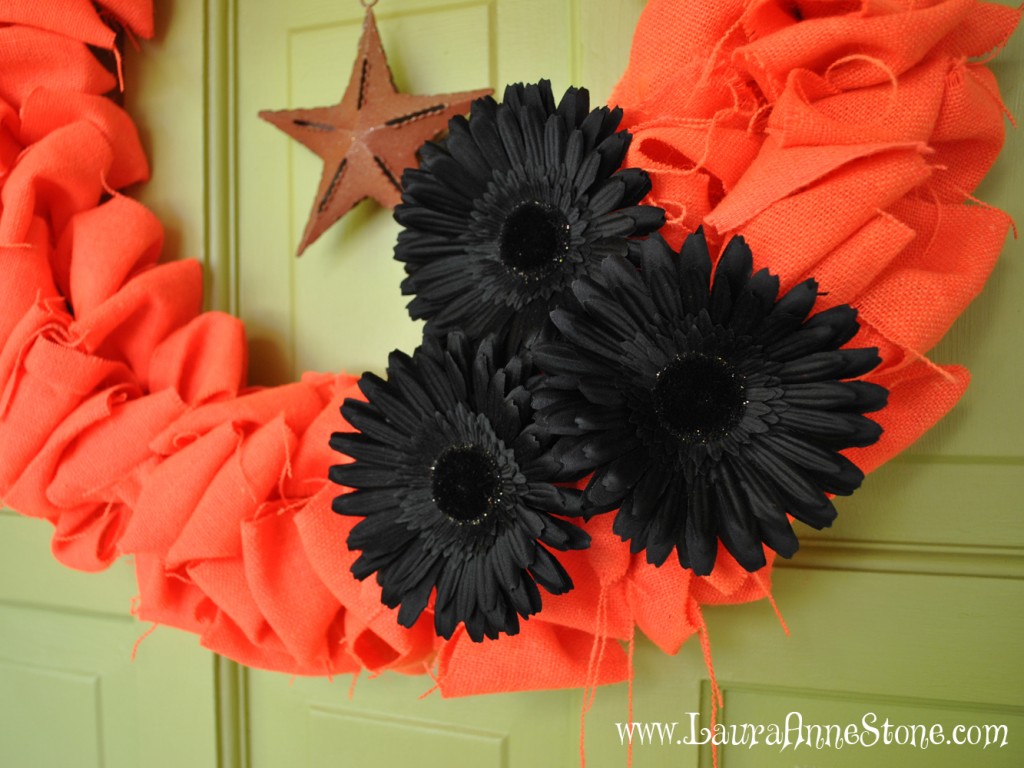
And there you have it, a darling ruffle wreath in a little less than the time it takes to watch a 50-year-old Peter O’Toole classic. Happy looping! 